Angular Authentication with OIDC: Using angular-oauth2-oidc Library
A guide to implementing secure single-page application authentication in Angular using the angular-oauth2-oidc library and OpenID Connect.
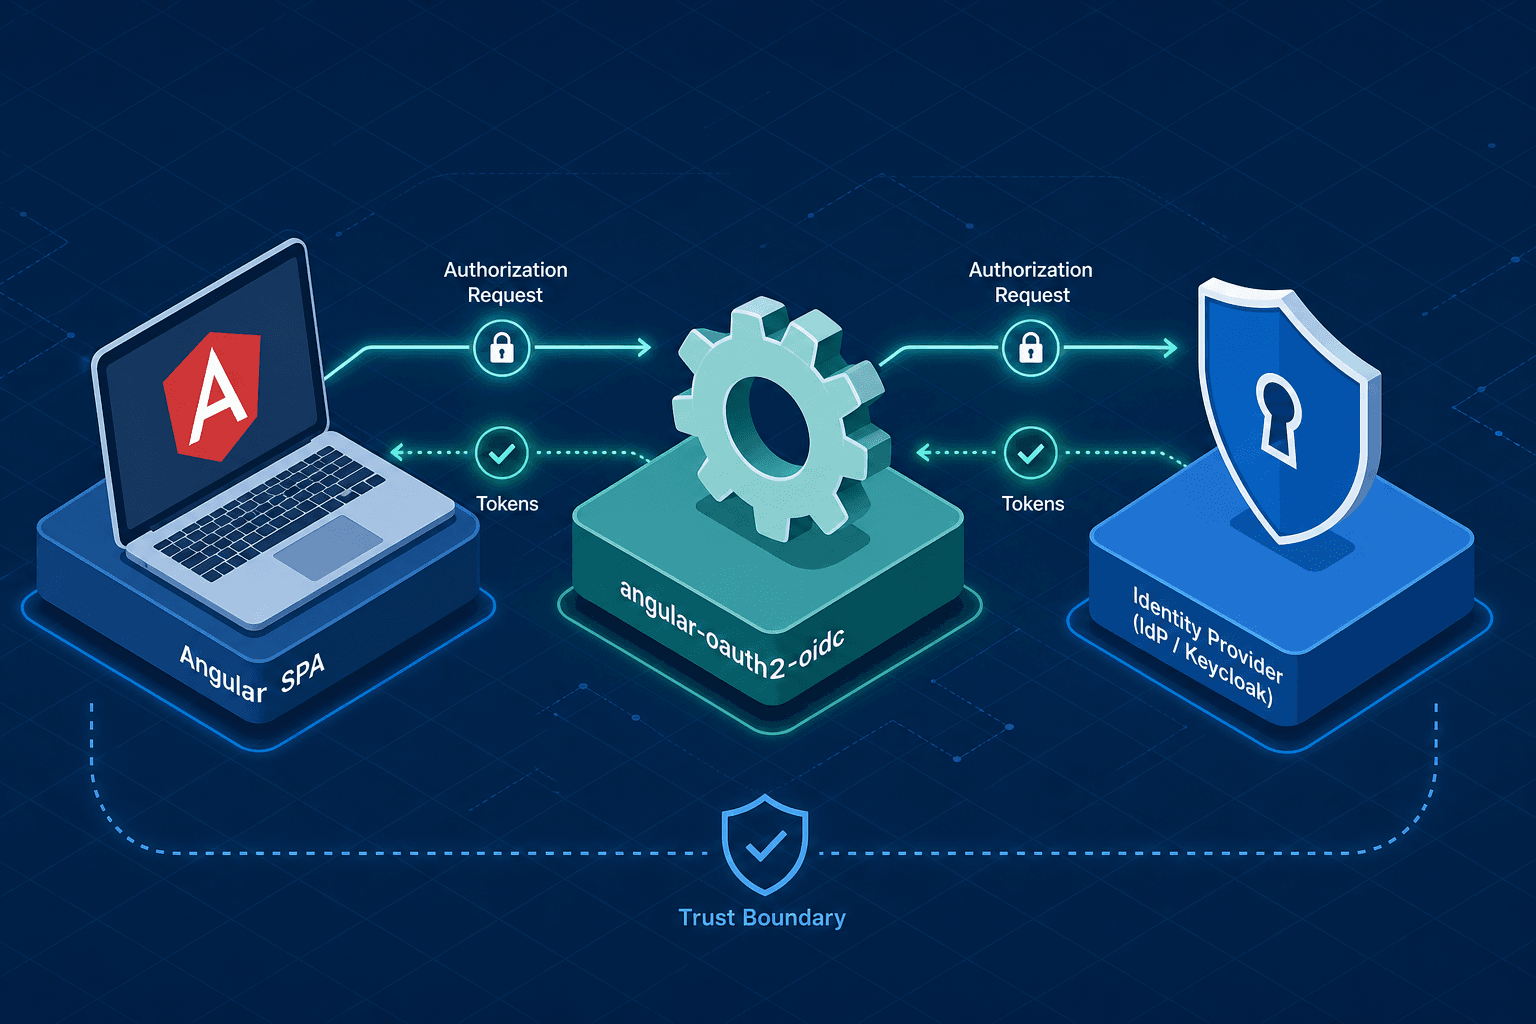
The Architecture of Trust: Angular, OIDC, and angular-oauth2-oidc
When you integrate OpenID Connect (OIDC) into an Angular Single Page Application (SPA), you are not simply "logging in." You are orchestrating a state transfer between a browser context, a trusted identity provider (IdP), and your application's internal security context. The angular-oauth2-oidc library is not a magic wrapper; it is a specialized state machine that manages the complex redirect loops, token exchanges, and cryptographic nonces required to prove a user's identity without exposing credentials to your backend.
The Redirect Mechanism and PKCE
Consider a user named Alice accessing your Angular app. She is not authenticated. The application cannot magically know who she is. Instead, the library must initiate a handover.
In the legacy Implicit Flow, the IdP would return the access token directly in the URL fragment (#access_token=...). This is dangerous because URL fragments are often logged by proxies or saved in browser history. The modern standard, mandated by the library for SPAs, is the Authorization Code Flow with PKCE (Proof Key for Code Exchange).
Here is the mechanism:
- Code Challenge: The library generates a random
code_verifierstring in memory. It hashes this (SHA-256) to create acode_challenge. - Redirect: The library redirects Alice to the IdP's authorization endpoint, passing the
code_challengeand the client ID. - Authentication: Alice logs in at the IdP. The IdP does not see the
code_verifier, only the hash. - Code Grant: The IdP redirects back to your Angular app with a short-lived
codein the query string. - Token Exchange: Your app (or the library acting on its behalf) sends the
codeand the originalcode_verifierto the IdP's token endpoint. The IdP verifies the hash matches. If it does, it issues the Access Token and ID Token.
This ensures that even if an attacker intercepts the redirect, they cannot exchange the code for a token without the code_verifier, which never left the browser.
// src/app/app.config.ts
import { provideOAuthClient } from 'angular-oauth2-oidc';
import { OAuthConfig } from 'angular-oauth2-oidc';

const oauthConfig: OAuthConfig = {
  issuer: 'https://keycloak.example.com/realms/my-realm',
  redirectUri: window.location.origin + '/home',
  clientId: 'my-angular-app',
  scope: 'openid profile email roles',
  showDebugInformation: true, // Only for development
  strictDiscoveryDocumentValidation: false, // Set true in production to strictly validate the discovery document fields against the OpenID Connect spec.
  requireHttps: true
};

export const appConfig = [
  provideOAuthClient(oauthConfig)
];
Configuration as State Machine Definition
The OAuthConfig object in angular-oauth2-oidc is often misunderstood as a simple connection string. In reality, it defines the boundaries of the trust chain.
The issuer is critical. The library fetches the .well-known/openid-configuration document from this URL. This document contains the dynamic endpoints (Authorization, Token, Userinfo, JWKs) for the IdP. If you hardcode these endpoints, you lose the ability to handle IdP migrations or cluster failovers automatically.
Crucially, the storageStrategy determines where the library persists the tokens. Recent versions of angular-oauth2-oidc default to sessionStorage rather than LocalStorage. While LocalStorage remains available, it is vulnerable to XSS (Cross-Site Scripting) attacks. If your application has an XSS vulnerability, a malicious script can read the tokens from LocalStorage.
While angular-oauth2-oidc does not enforce a specific storage backend, the library's design assumes the storage is accessible. For high-security applications, you must implement a custom Storage service that writes to sessionStorage (cleared on tab close) or, ideally, utilizes HttpOnly cookies managed by your backend to prevent JavaScript access entirely. The library supports this via the storage property in the configuration, but the mechanism of how the tokens are retrieved and stored remains your responsibility.
// src/app/auth.service.ts
import { Injectable } from '@angular/core';
import { AuthService, OAuthState } from 'angular-oauth2-oidc';

@Injectable({ providedIn: 'root' })
export class MyAuthService extends AuthService {
  constructor(authService: AuthService) {
    super(authService);
  }

  // Hook into the token acquisition flow
  async configure() {
    await super.configure();
    // Custom logic to validate the ID token signature using the public key
    // fetched from the discovery document
    this.registerInterceptor();
  }

  registerInterceptor() {
    // The library provides a default interceptor, but we can extend it
    // to add custom claims or handle specific refresh token logic
  }
}
Token Handling and the HttpClient Interceptor
Once Alice successfully authenticates, the IdP returns an ID Token (JWT containing user claims) and an Access Token (JWT containing scopes). The angular-oauth2-oidc library parses these tokens and stores them.
The mechanism for securing API calls is the HttpInterceptor. When you make an HTTP request from Angular, the interceptor checks if an Access Token exists in the library's internal store. If it does, it injects the Authorization: Bearer <token> header into the request.
This is where the "blind trust" model of SPAs can fail. The library does not validate the token's signature on every request. It assumes the token is valid until it expires. If the token is stolen, the attacker can use it until it expires or the server revokes it.
To handle token expiration gracefully, the library exposes an isAuthenticated$ observable. This stream emits true or false based on the current token state. You can subscribe to this in your AuthGuard or CanActivate route guards.
// src/app/app.component.ts
import { Component, OnInit } from '@angular/core';
import { AuthService } from 'angular-oauth2-oidc';

@Component({
  selector: 'app-root',
  template: `
    <nav *ngIf="authService.isAuthenticated$ | async">
      Welcome, {{ authService.getUserData()?.name }}
    </nav>
    <router-outlet></router-outlet>
  `
})
export class AppComponent implements OnInit {
  constructor(public authService: AuthService) {}

  ngOnInit() {
    // The library automatically handles the silent renewal (refresh token)
    // if configured correctly with an IdP that supports it.
    // If the token expires, the library attempts to refresh it silently.
    // If that fails, it triggers the login flow.
    this.authService.setupAutomaticSilentRefresh();
  }
}
Handling Keycloak Specifics and RBAC
Keycloak, a popular open-source identity provider, adds specific complexity to the OIDC flow. While Keycloak is OIDC compliant, it often includes custom claims like realm_access and resource_access which contain role information.
The standard angular-oauth2-oidc library handles standard OIDC claims automatically. However, non-standard claims like Keycloak's realm_access require manual parsing logic. You must manually parse the id_token or access_token to extract these specific roles.
Consider a scenario where Alice needs access to the "Admin" panel. The id_token from Keycloak might look like this in the payload:
{
  "sub": "alice-uuid",
  "email": "alice@example.com",
  "realm_access": {
    "roles": ["user", "admin"]
  },
  "resource_access": {
    "my-client": {
      "roles": ["viewer"]
    }
  }
}
The angular-oauth2-oidc library provides a getUserData() method which returns the claims from the ID token. You can write a utility function to extract these roles and store them in a local state service.
// src/app/user.service.ts
import { Injectable } from '@angular/core';
import { AuthService } from 'angular-oauth2-oidc';

@Injectable({ providedIn: 'root' })
export class UserService {
  private roles: string[] = [];

  constructor(private authService: AuthService) {}

  getRoles(): string[] {
    return this.roles;
  }

  loadRoles() {
    const userData = this.authService.getUserData();
    if (!userData) return;

    // Extract roles from realm_access
    const realmAccess = userData.realm_access;
    if (realmAccess && realmAccess.roles) {
      this.roles = realmAccess.roles;
    }

    // Extract roles from resource_access (if needed)
    const resourceAccess = userData.resource_access;
    if (resourceAccess && resourceAccess['my-client']) {
       this.roles = [...this.roles, ...resourceAccess['my-client'].roles];
    }
  }
}
You can then use this UserService in your route guards to control access.
// src/app/admin.guard.ts
import { Injectable } from '@angular/core';
import { CanActivate, Router } from '@angular/router';
import { UserService } from './user.service';

@Injectable({ providedIn: 'root' })
export class AdminGuard implements CanActivate {
  constructor(private userService: UserService, private router: Router) {}

  canActivate(): boolean {
    const roles = this.userService.getRoles();
    if (roles.includes('admin')) {
      return true;
    }
    this.router.navigate(['/home']);
    return false;
  }
}
Conclusion
Implementing authentication in Angular is not about copying a configuration block. It is about understanding the state machine: the redirect, the code exchange, the token storage, and the claim extraction. The angular-oauth2-oidc library abstracts the HTTP protocol details, allowing you to focus on the application logic—managing the user's session state and enforcing access control based on the claims returned by the identity provider.
By explicitly handling the PKCE flow, validating the storage strategy, and mapping IdP-specific claims like Keycloak's realm_access to your application's roles, you build a security posture that is robust against common SPA attacks like CSRF and token leakage. The library is a tool, but the architecture you build around it defines the security of your application.
Common Pitfalls
- Relying on LocalStorage for Tokens: Using
localStorageleaves tokens exposed to XSS attacks; always prefersessionStorageor HttpOnly cookies for sensitive data. - Ignoring Discovery Document Validation: Disabling
strictDiscoveryDocumentValidationin production can leave your app vulnerable to man-in-the-middle attacks that spoof the IdP configuration. - Assuming Automatic Role Mapping: The library does not automatically map Keycloak-specific claims like
realm_accessto application roles; you must implement custom parsing logic to extract these values.
Practical Takeaways
- Principle of Least Privilege: Configure your OIDC scopes to request only the minimum necessary data (e.g.,
openid,profile) rather than broad access. - Defense in Depth: Never rely solely on client-side validation; always validate tokens and signatures server-side before processing sensitive requests.
- Stateless Security: Treat the browser as an untrusted environment; ensure that session management relies on secure, server-controlled mechanisms like HttpOnly cookies where possible.
FAQ
Q: Does angular-oauth2-oidc support refresh tokens?
A: Yes, the library supports refresh tokens, but they must be explicitly enabled in the configuration and supported by the Identity Provider.
Q: Can I use angular-oauth2-oidc with providers other than Keycloak?
A: Yes, the library is designed to be provider-agnostic and works with any OIDC-compliant Identity Provider, including Auth0, Azure AD, and Okta.
Q: How do I handle token expiration if the user is on a background tab?
A: The library provides setupAutomaticSilentRefresh() which attempts to refresh the token silently in the background. If the refresh fails (e.g., due to a revoked session), it triggers the login flow when the user returns to the tab.
Related posts
Building Secure Micro-Frontends with OIDC and Token Mediation
This article covers secure micro-frontend architecture using OIDC protocols and token mediation strategies for Single Page Applications.
Understanding OAuth2 Multiple Response Types: A Technical Guide
An examination of OAuth2 response types including hybrid flow, OIDC response types, and authorization server configurations for beginners.
Building an Identity-Aware API Gateway with Kong and OIDC
A guide to configuring Kong Gateway with OpenID Connect for secure API authentication using JWT tokens.