OpenID Connect Guide: Extending OAuth 2.0 for Identity Verification
An examination of OpenID Connect (OIDC) and how it extends OAuth 2.0 to handle identity verification using ID tokens and discovery protocols.
OpenID Connect (OIDC) is not a replacement for OAuth 2.0 but a standardized layer of protocol messages that transforms OAuth's "access grant" mechanism into a verifiable identity assertion using ID tokens and JSON Web Tokens (JWTs). This guide examines the core mechanisms of OIDC, from the identity gap in OAuth 2.0 to the discovery protocols and secure flows like PKCE, showing how modern identity verification works.
The Identity Gap: Why OAuth 2.0 Needs a Layer
OAuth 2.0 was designed strictly as an authorization framework, not an authentication one. Its primary mechanism is granting a third-party application limited access to resources on behalf of a resource owner. When an application successfully authenticates a user via OAuth, it receives an access token. This token is an opaque string (or sometimes a JWT) that proves the application has permission to call an API. However, the access token itself contains no standardized information about who the user is. It is merely a key to a door, not an ID card.
In a typical OAuth scenario, if Application A wants to know the email address of the user logging in, it must make a separate API call to a user info endpoint. This endpoint is not defined by the OAuth 2.0 specification; it is an ad-hoc addition by the provider. This creates a fragmentation where every identity provider implements a different set of claims and endpoints.
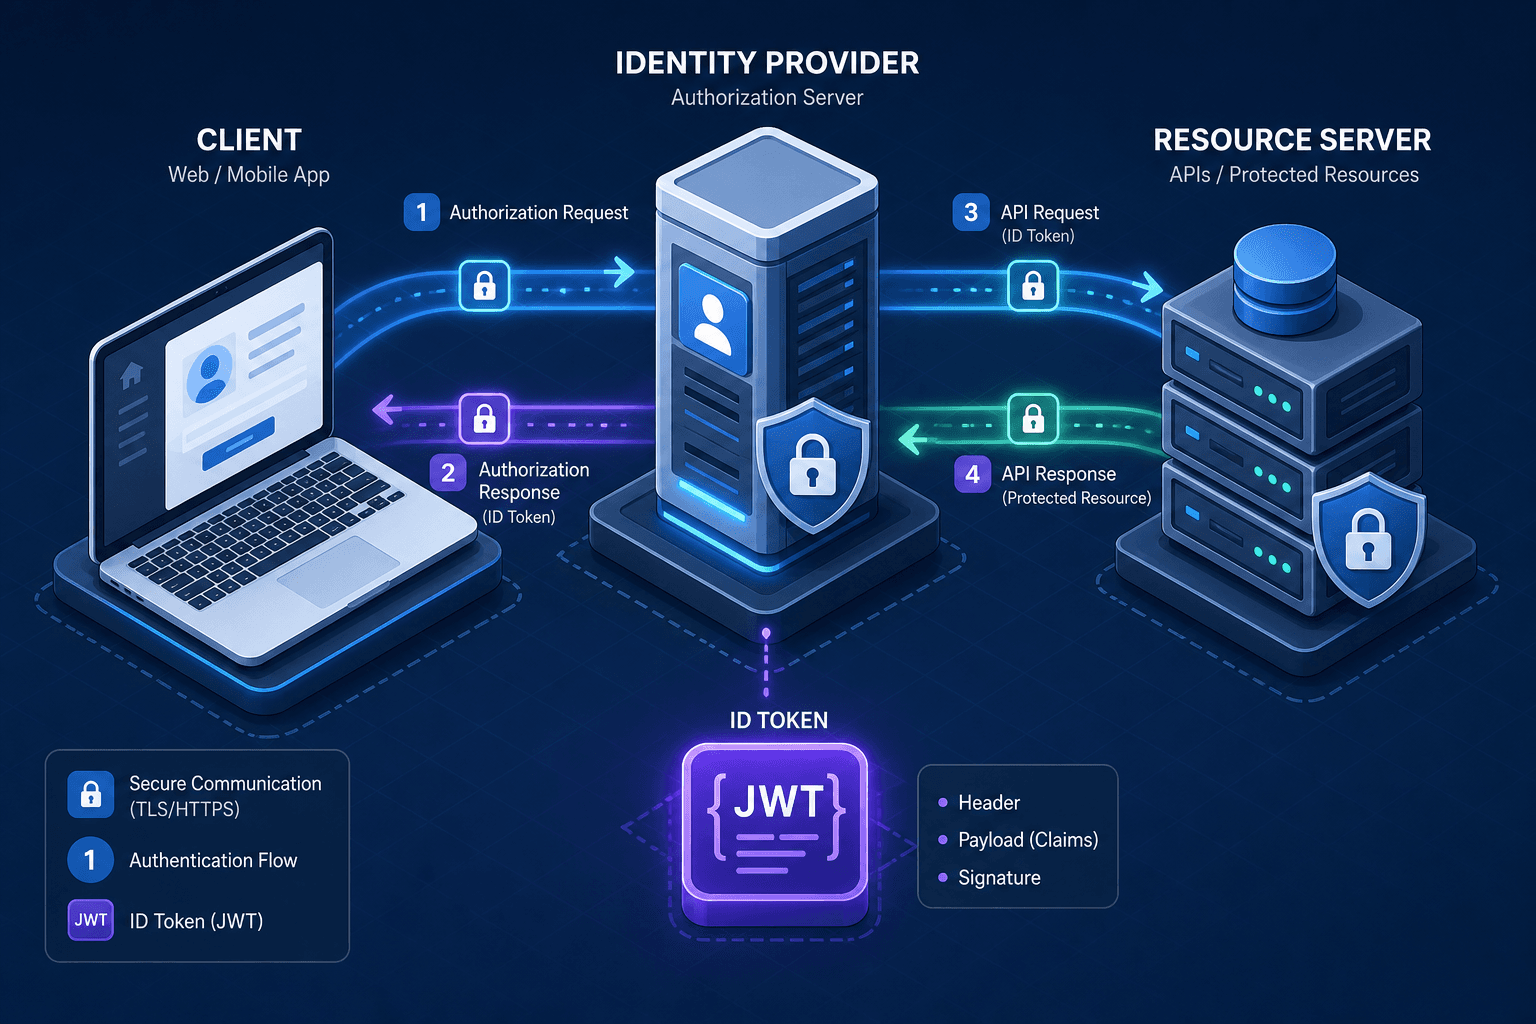
OpenID Connect (OIDC) solves this by defining a standardized identity layer on top of OAuth 2.0. The core mechanism here is the ID Token. Unlike the access token, which is meant for APIs, the ID Token is a JSON Web Token (JWT) issued specifically to the client to prove the user's identity.
When a user logs in, the Identity Provider (IdP) issues three tokens:
- Access Token: For calling protected APIs.
- ID Token: A signed JWT containing user identity claims (e.g.,
sub,name,email). - Refresh Token: For obtaining new access tokens without re-authenticating.
The critical distinction is the signature. The ID Token is signed by the Identity Provider using a private key. The client (the relying party) can verify this signature using the provider's public keys. This cryptographic binding ensures that the identity claims inside the token have not been tampered with and actually originate from the trusted IdP.
The Discovery Protocol: Automating Configuration
One of the most significant friction points in early identity systems was configuration management. Clients had to hardcode the URLs for the authorization endpoint, token endpoint, and user info endpoint. If the IdP moved its infrastructure, the client broke.
OIDC introduces a discovery mechanism to resolve this. The standard defines a well-known URI: /.well-known/openid-configuration. This is a JSON document hosted at the root of the Identity Provider's domain.
Consider a client application named MyApp connecting to an IdP named AuthCorp. Instead of hardcoding https://authcorp.com/oauth/authorize, MyApp makes a simple HTTP GET request to https://authcorp.com/.well-known/openid-configuration.
GET https://authcorp.com/.well-known/openid-configuration HTTP/1.1
Host: authcorp.com
The response is a JSON object containing the configuration metadata:
{
  "issuer": "https://authcorp.com",
  "authorization_endpoint": "https://authcorp.com/oauth/authorize",
  "token_endpoint": "https://authcorp.com/oauth/token",
  "userinfo_endpoint": "https://authcorp.com/oauth/userinfo",
  "jwks_uri": "https://authcorp.com/.well-known/jwks.json",
  "response_types_supported": ["code", "id_token", "code id_token"],
  "subject_types_supported": ["public", "pairwise"],
  "id_token_signing_alg_values_supported": ["RS256", "ES256"]
}
This single endpoint allows the client to dynamically discover:
- Where to send the user for authentication (
authorization_endpoint). - Where to exchange the code for tokens (
token_endpoint). - Where to fetch the public keys for verifying signatures (
jwks_uri). - Which algorithms are supported for signing tokens (
id_token_signing_alg_values_supported).
This mechanism decouples the client from the infrastructure topology. If AuthCorp rotates their keys or changes their internal routing, they only update this JSON file. The client automatically fetches the new configuration on startup or cache expiration.
The Authorization Code Flow with PKCE
While the "Implicit Flow" existed in early OIDC drafts, it is now deprecated due to security risks involving token leakage in the URL fragment. The modern standard mandates the Authorization Code Flow, often enhanced with Proof Key for Code Exchange (PKCE) to secure public clients (like Single Page Applications or mobile apps) that cannot store a client secret.
Let's trace the mechanism with two actors: Client (a React SPA) and IdP (AuthCorp).
-
Code Challenge Generation: The Client generates a random string called
code_verifier. It then hashes this verifier using SHA-256 and encodes it to create acode_challenge.const codeVerifier = generateRandomString(); const codeChallenge = base64urlEncode(sha256(codeVerifier)); -
Authorization Request: The Client redirects the user's browser to the Authorization Endpoint. It includes the
code_challengeandcode_challenge_method(usually S256) in the request parameters.GET /oauth/authorize? client_id=client_123& redirect_uri=https://myapp.com/callback& response_type=code& scope=openid profile email& code_challenge=xyz123...& code_challenge_method=S256 -
User Authentication: The IdP authenticates the user. Upon success, it generates a short-lived
authorization_codeand redirects the browser back to the Client'sredirect_uriwith this code. -
Token Exchange: The Client's backend (or the SPA directly) receives the code. It now calls the Token Endpoint to exchange the code for the tokens. Crucially, it must send the original
code_verifier(not the hash) in the request.POST /oauth/token Content-Type: application/x-www-form-urlencoded grant_type=authorization_code& code=AUTH_CODE_RECEIVED& redirect_uri=https://myapp.com/callback& client_id=client_123& code_verifier=original_random_string -
Verification: The IdP computes the code challenge from the received
code_verifierand compares it to thecode_challengestored during step 2. If they match, it issues the ID Token, Access Token, and Refresh Token.
This mechanism prevents authorization code interception attacks. Even if an attacker intercepts the authorization code, they cannot exchange it for a token because they do not possess the code_verifier that matches the challenge.
Token Validation and Claims
Receiving the ID Token is not enough; the client must validate it cryptographically. The ID Token is a JWT consisting of three parts: Header, Payload, and Signature.
The validation process involves several strict checks:
-
Signature Verification: The client fetches the public keys from the
jwks_uridiscovered earlier. It selects the key corresponding to thekid(key ID) in the JWT header and verifies the signature using the algorithm specified (e.g., RS256). If the signature fails, the token is rejected immediately. -
Standard Claim Validation: The client must validate specific claims in the JWT payload to ensure the token is intended for them and is still valid.
iss(Issuer): Must match the Issuer value from the discovery document.aud(Audience): Must contain theclient_idof the current application.exp(Expiration): The current time must be before the expiration time.iat(Issued At): The token should not be issued in the future.
-
Nonce Validation: If the client sent a
nonceparameter in the initial authorization request AND theopenidscope was requested, it must verify that thenonceclaim in the ID Token matches exactly. This strict requirement prevents replay attacks where an old ID Token is reused. While OIDC recommends nonce usage for public flows, the specification mandates it when theopenidscope is present. -
Claims and UserInfo: The ID Token contains a subset of identity claims. If the application needs more detailed profile information (e.g.,
phone_number,address), it uses theaccess_tokenobtained in the same flow to call theuserinfo_endpoint.GET /oauth/userinfo HTTP/1.1 Authorization: Bearer ACCESS_TOKENThe IdP returns a JSON object with the additional claims. This separation allows the IdP to control the granularity of data shared. The ID Token is for authentication verification, while the UserInfo endpoint is for profile enrichment.
The Trust Boundary
OpenID Connect shifts the trust model from "trust the network" to "trust the cryptographic signature." In a legacy system, a developer might trust that a redirect URL is safe. In OIDC, the client trusts the signature of the ID Token.
This mechanism ensures that even if the communication channel is compromised, the identity claims cannot be forged without the IdP's private key. The sub (subject) claim serves as the unique identifier for the user, stable across different sessions and applications, allowing the client to link the user to their local database securely.
By standardizing the ID Token structure, the discovery protocol, and the validation logic, OIDC provides a consistent way to implement Single Sign-On (SSO) across diverse ecosystems. It turns the chaotic landscape of custom authentication APIs into a predictable, interoperable protocol where the client only needs to understand one set of rules to work with any compliant Identity Provider.
Conclusion
OpenID Connect stands as the definitive standard for identity verification in modern web architecture. By extending OAuth 2.0 with the ID Token and a standardized discovery mechanism, it solves the fragmentation issues of early authentication systems. The mandatory use of PKCE ensures that public clients remain secure, while the rigorous validation of JWT claims guarantees that identity assertions are trustworthy. As developers build complex, distributed systems, understanding these OIDC mechanisms is essential for implementing secure, scalable, and interoperable authentication solutions.
FAQ
How does OIDC differ from OAuth? OAuth 2.0 is strictly an authorization framework for granting access to resources, whereas OpenID Connect (OIDC) is an identity layer built on top of OAuth. OIDC adds the ID Token to provide verifiable identity information about the user, which OAuth 2.0 does not define natively.
What is the role of the nonce?
The nonce (number used once) is a random value sent by the client in the authorization request. The IdP includes this same value in the ID Token. Verifying that the nonce in the token matches the one sent prevents replay attacks where an attacker might try to reuse a previously captured ID Token.
Can I use OIDC without a client secret? Yes. This is a primary use case for Public Clients, such as Single Page Applications (SPAs) or mobile apps. In these scenarios, the application cannot securely store a client secret. OIDC supports this through the Authorization Code Flow with PKCE, which uses a code verifier and challenge to prove the client's identity without needing a secret.
Practical Takeaways
- Identity Verification: OIDC solves OAuth's identity gap by introducing the ID Token, a signed JWT that allows clients to cryptographically verify who the user is.
- Token Validation: Successful OIDC integration requires strict validation of the ID Token's signature, issuer (
iss), audience (aud), and expiration (exp) claims. - PKCE Security: The Proof Key for Code Exchange (PKCE) mechanism is essential for securing public clients, preventing authorization code interception attacks without the need for a client secret.
Related posts
Understanding OAuth2 Multiple Response Types: A Technical Guide
An examination of OAuth2 response types including hybrid flow, OIDC response types, and authorization server configurations for beginners.
Angular OAuth2/OIDC: loadDiscoveryDocumentAndTryLogin
Learn how to use loadDiscoveryDocumentAndTryLogin and strict discovery document validation in Angular for secure OAuth2/OIDC authentication.
The AuthConfig Reference: Every Property That Matters
A complete reference for Angular-OAuth2-OIDC AuthConfig properties, covering requireHttps, remoteOnly, and nonceStateSeparator for secure Angular authentication.