Implementing OIDC Authentication in Spring Boot with Keycloak
A walkthrough for implementing OIDC authentication in Spring Boot using Keycloak, covering setup and configuration.
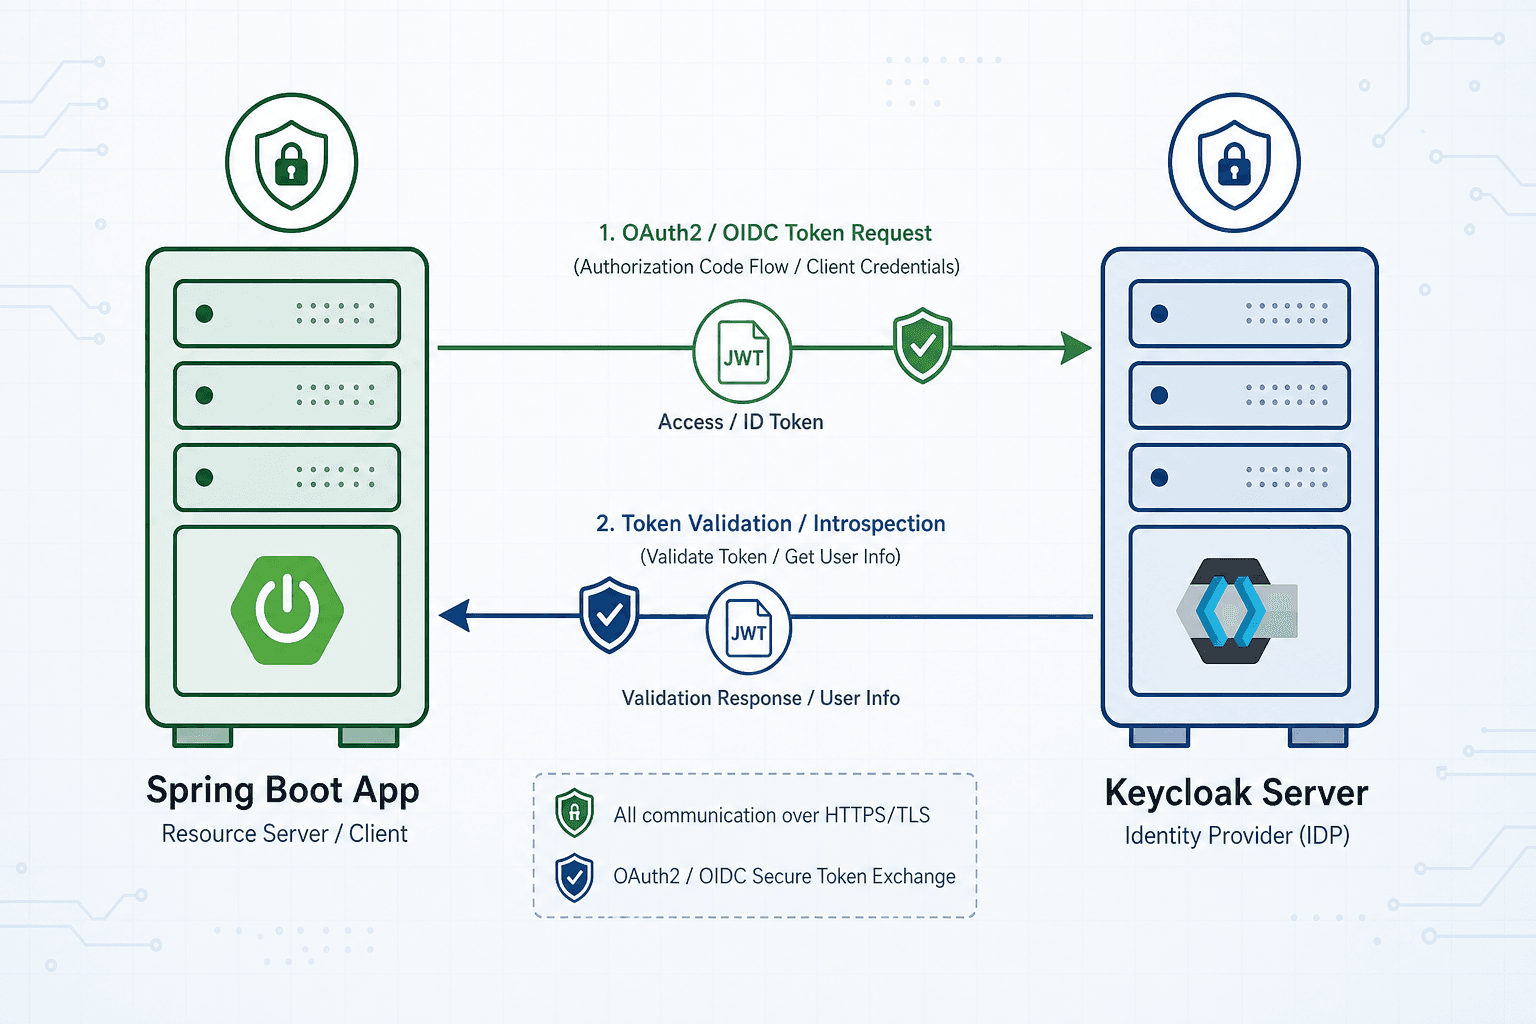
This guide details the integration of OpenID Connect (OIDC) authentication within a Spring Boot application, leveraging Keycloak as the identity provider. As Part 3 of the OpenID Connect Deep Dive Series, we move beyond abstract concepts to examine the cryptographic handshake that secures user sessions. The core mechanism relies on Spring Boot acting as a resource server that validates tokens issued by Keycloak, establishing trust through public key verification without requiring an external reverse proxy.
The Trust Mechanism: Issuer and JWKS
The foundation of this integration is establishing a verified trust chain. In the OIDC flow, the client application must explicitly identify the entity that issued the token. This is governed by the iss (Issuer) claim embedded within the JSON Web Token (JWT). Spring Boot does not infer this value; it requires a strict issuer-uri configuration.
Upon application startup, the spring-security-oauth2-client library contacts the configured issuer URI to retrieve a discovery document (typically found at /.well-known/openid-configuration). This document provides the URL for the JSON Web Key Set (JWKS), which contains the public keys Keycloak uses to sign tokens.
Every time a request arrives with a Bearer token, the security filter performs the following steps:
- It extracts the
kid(Key ID) from the token header. - It locates the corresponding public key from the cached JWKS.
- It performs an RSA or ECDSA signature verification.
If the iss claim does not match the configured issuer, or if the signature fails to verify against the retrieved public key, the request is rejected immediately. This ensures that even if a token is intercepted, it cannot be re-signed by an attacker who lacks the private key. This mechanism isolates authentication logic from business logic, allowing the application to focus solely on authorization decisions.
Configuration Artifacts: Wiring the Connection
To operationalize this trust, specific configuration artifacts must be defined in application.properties or application.yml. These artifacts define the registration details and provider connection settings.
Consider a scenario where you have a Keycloak realm named my-realm and a client named spring-boot-app. The configuration must map the client credentials and the discovery endpoint precisely.
# Define the OIDC provider connection details
spring.security.oauth2.client.provider.keycloak.issuer-uri=https://keycloak.example.com/realms/my-realm

# Register the client with Keycloak
spring.security.oauth2.client.registration.keycloak.client-id=spring-boot-app
spring.security.oauth2.client.registration.keycloak.client-secret=your-secret-key
spring.security.oauth2.client.registration.keycloak.authorization-grant-type=authorization_code
spring.security.oauth2.client.registration.keycloak.scope=openid,profile,email

# Configure the redirect URI for the OAuth2 callback
spring.security.oauth2.client.registration.keycloak.redirect-uri={baseUrl}/login/oauth2/code/{registrationId}
The spring.security.oauth2.client.provider.keycloak.issuer-uri serves as the critical anchor. It must point to the realm-specific discovery endpoint. Pointing this to the root server URL instead of the realm URL will cause signature verification to fail because the public keys are scoped to the specific realm.
The scope parameter dictates what claims Keycloak is permitted to return in the ID token. Requesting openid ensures Keycloak returns an ID token; omitting it results in only an access token being returned, which breaks the user identity flow.

The Token Flow Scenario
Understanding the runtime behavior requires tracing the data flow between the browser, the application, and the identity provider. Imagine Alice (the user) attempts to access https://myapp.com/admin/dashboard. Spring Boot detects the request lacks an Authorization header and initiates the OAuth2 login flow.
- Redirection: Spring Boot generates a unique
stateparameter and redirects Alice to the Keycloak authorization endpoint:https://keycloak.example.com/realms/my-realm/protocol/openid-connect/auth?client_id=spring-boot-app&redirect_uri=...&state=xyz. - Authentication: Alice authenticates against Keycloak. Keycloak validates her credentials against its database.
- Token Exchange: Keycloak redirects Alice back to Spring Boot with an authorization code. The
AuthorizationCodeRequestAuthenticationFilterintercepts this code and initiates the exchange. TheOAuth2AuthorizedClientRepositorythen persists the resultingOAuth2AuthorizedClient. - Code Swap: Spring Boot sends the code, client ID, and client secret to Keycloak's token endpoint. Keycloak responds with a JSON payload containing an
access_token(JWT) and anid_token(JWT). - Validation: Spring Boot validates the
id_tokensignature using the JWKS keys fetched during startup. It then decodes the token, extracting thesub(subject) andemailclaims. - Context Population: Spring Security creates a
JwtAuthenticationTokenand injects it into theSecurityContext. The application now treats Alice as an authenticated user.
This sequence occurs synchronously during the HTTP redirect. By the time the browser reloads the dashboard, the session is active, and the token is cached in the OAuth2AuthorizedClient store.
Resource Protection and Authorization
Once the token is validated, the application must enforce access control. Spring Boot offers two primary mechanisms: URL security rules and method-level annotations. Both rely on the Authentication object stored in the context, which contains the decoded claims from the JWT.
For URL-based protection, you configure a security filter chain to require specific authorities. For instance, to restrict access to /admin/**, you ensure the token contains a role claim mapped to ROLE_ADMIN.
@Configuration
@EnableWebSecurity
public class SecurityConfig {

    @Bean
    public SecurityFilterChain filterChain(HttpSecurity http) throws Exception {
        http
            .authorizeHttpRequests(auth -> auth
                .requestMatchers("/public/**").permitAll()
                .anyRequest().authenticated()
            )
            .oauth2Login(oauth2 -> oauth2
                .defaultSuccessUrl("/dashboard", true)
            );
        return http.build();
    }
}
For more granular control, @PreAuthorize allows inspection of specific claims within the JWT directly. This is useful for validating attributes like email domains.
@Service
public class UserService {

    @PreAuthorize("#email == authentication.principal.email")
    public User getUserByEmail(String email) {
        // Logic to fetch user details
        return new User();
    }
}
In this snippet, Spring Boot injects the authentication object into the SpEL expression. The authentication.principal is the Jwt object, and .email accesses the claim directly from the token payload. This ensures authorization decisions are based on the actual content of the token rather than a generic authentication flag.
Common Pitfalls
When integrating OIDC, several configuration errors frequently break the authentication flow.
- Issuer URI Mismatch: The most common error is configuring the
issuer-uriincorrectly. If the URI points to the root of the Keycloak server instead of the specific realm (e.g.,https://keycloak.example.com/vshttps://keycloak.example.com/realms/my-realm), the discovery document fails to load, and signature verification cannot occur. - Scope Misconfiguration: Omitting the
openidscope in the client registration prevents Keycloak from issuing an ID token. Without the ID token, Spring Security cannot extract user identity claims, leaving the user authenticated but anonymous. - JWK Cache Expiration: Keycloak may rotate signing keys periodically. If the application's JWKS cache is not refreshed or if the
jwk-set-uriis hardcoded incorrectly, valid tokens may be rejected after the rotation occurs. Ensure thespring.security.oauth2.client.providerconfiguration allows for dynamic JWKS retrieval.
Dependencies and Versioning
A common integration pitfall is version mismatch. The spring-security-oauth2-client module is part of the Spring Security BOM. You must ensure your build configuration includes the correct dependency version matching your Spring Boot release.
<dependency>
    <groupId>org.springframework.boot</groupId>
    <artifactId>spring-boot-starter-oauth2-client</artifactId>
</dependency>
Using an older version of the client library with a newer Spring Boot version can result in missing classes or deprecated endpoints, breaking the discovery mechanism.
While Spring Boot handles the heavy lifting, it is recommended to explicitly configure the jwk-set-uri in the provider section if your Keycloak instance uses a custom SSL certificate or if the discovery document is unreachable in certain network policies. Relying solely on auto-discovery can lead to silent failures in production. Explicitly setting the JWK URI ensures the application knows exactly where to fetch the keys, reducing the attack surface for DNS spoofing or misconfiguration.
Conclusion
Implementing OIDC in Spring Boot with Keycloak is a process of configuring trust and defining access rules. The application acts as a gatekeeper, validating the cryptographic signature of incoming tokens against Keycloak's public keys. By correctly setting the issuer URI and client credentials, you establish a secure channel. The flow from user login to token validation is automated by the security filter chain, populating the context with user identity. Finally, resource protection is achieved by inspecting the claims within the validated token, ensuring that only authorized users can access specific endpoints. This architecture shifts the burden of identity management to Keycloak while keeping the application logic clean and focused on business rules.
Practical Takeaways
- Trust Anchor First: Always verify the
issuer-urimatches the specific realm URL before debugging token validation issues. - Scope Matters: The
openidscope is non-negotiable for identity flows; without it, you only get an access token, not user identity. - Decouple Identity: Keep your application focused on authorization logic; rely on Keycloak for the complexity of user management and token issuance.
FAQ
Q: Can I use Keycloak for both authentication and as a resource server? A: Yes, Keycloak can act as an Identity Provider (IdP) for your applications and also expose APIs protected by OIDC, but your Spring Boot app typically acts as the resource server consuming the tokens.
Q: What happens if the Keycloak server goes down? A: If the Keycloak server is unavailable, new login attempts will fail. Existing sessions relying on cached tokens may continue to work until the token expires, provided the JWKS cache remains valid.
Q: How do I handle token refresh?
A: Spring Boot's OAuth2AuthorizedClientRepository automatically handles the refresh token exchange when the access token expires, provided the authorization-grant-type is set to authorization_code and the client supports refresh tokens.
Related posts
Building a Self-Service Password Reset with Spring Boot and Keycloak
A walkthrough of implementing password recovery and self-service identity flows using Spring Boot and Keycloak required actions.
Keycloak and Spring Boot Integration: Advanced Patterns
Explore advanced Keycloak and Spring Boot integration patterns including multi-tenant setups and reactive security.
Multi-Factor Authentication with OIDC: Implementing MFA
An examination of implementing multi-factor authentication using OIDC, covering Keycloak, WebAuthn, TOTP, and step-up authentication via ACR.