OIDC Claims: The Mechanics of Identity Customization
Learn how to customize user identity information in OpenID Connect by configuring OIDC claims, claim mapping, and Keycloak protocol mappers.
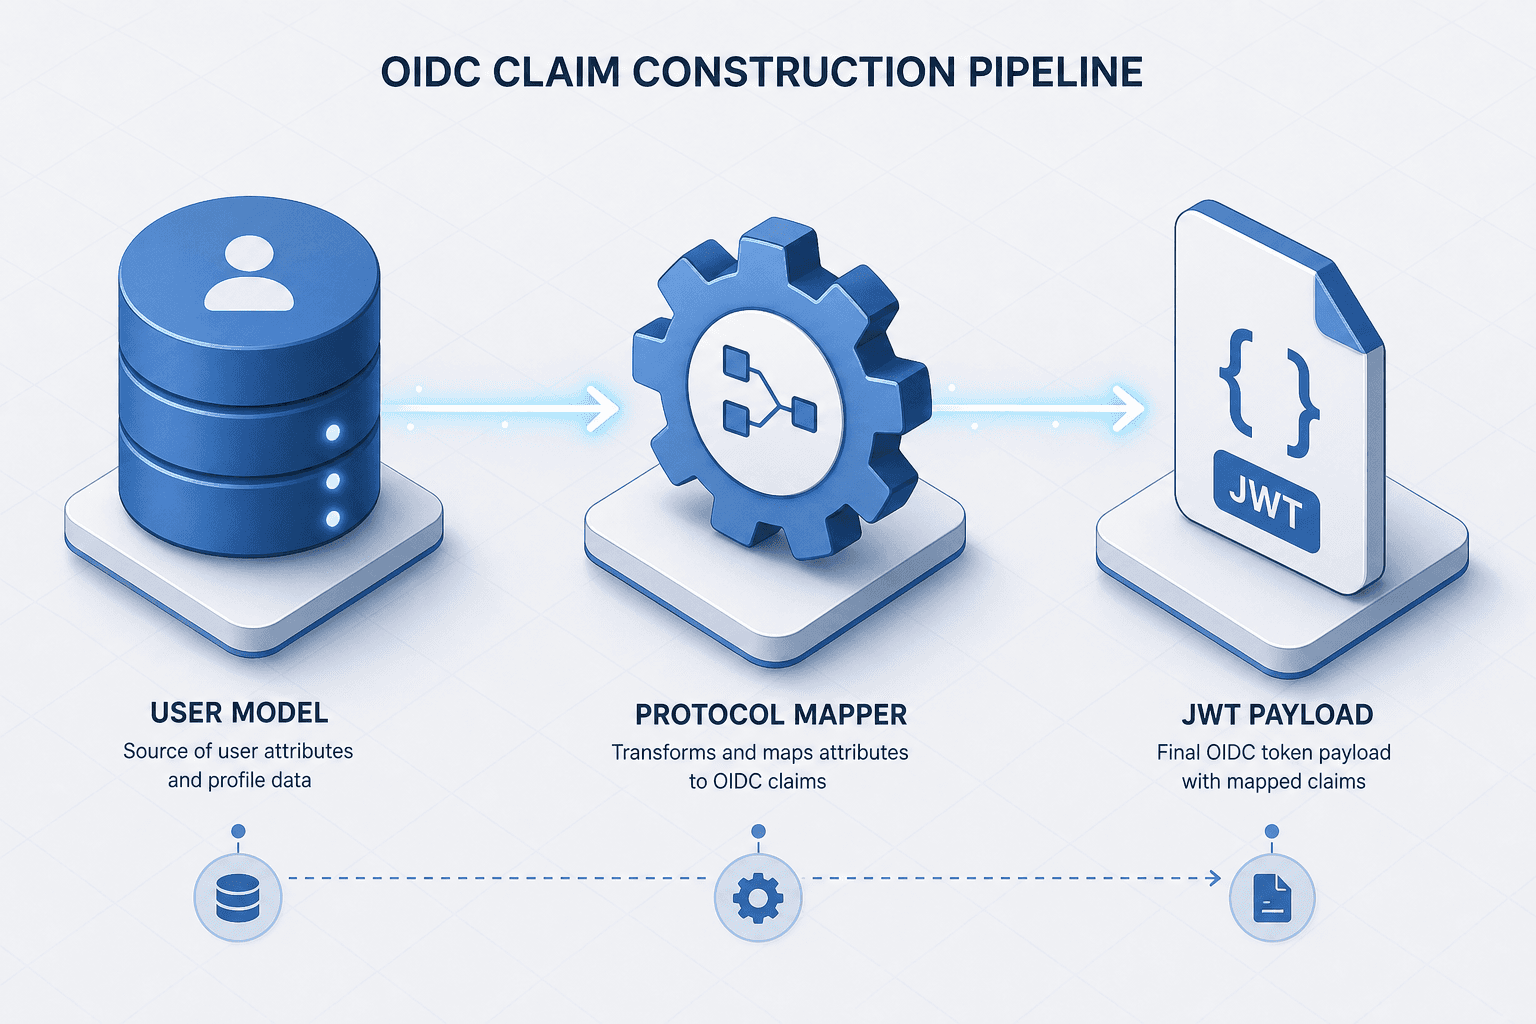
In OpenID Connect (OIDC), user identity is not a static object retrieved from a database but a composite artifact constructed dynamically at the moment of token issuance. This article, Part 10 of the OpenID Connect Deep Dive Series, explores the mechanism of claim construction: the interaction between the User Model, the Protocol Mapper, and the Client's requested scopes. Understanding this pipeline is essential for customizing user identity information without modifying the underlying user storage.
The Claim Construction Pipeline
When an authorization code is exchanged for an ID token, the Authorization Server (AS) does not simply serialize the user record. It executes a deterministic pipeline. First, the AS retrieves raw user attributes from the identity store. Second, it evaluates the list of protocol mappers configured for the client. Third, it executes the logic defined in those mappers to generate specific claim values. Finally, it assembles these values into the JSON Web Token (JWT) payload.
This pipeline allows for decoupling. A user might have a preferred_username in the database, but the ID token might expose email or employee_id depending on the mapper logic. Standard claims like sub (subject), iss (issuer), and aud (audience) are generated automatically by the OIDC protocol specification as defined in RFC 7519. However, custom claims like department or role require explicit instruction. Without a protocol mapper, the AS has no mechanism to know that the user_attributes.department field should be mapped to the department claim in the token.
Keycloak Protocol Mappers as the Translation Layer
Keycloak implements this translation layer through Protocol Mappers. A mapper defines three critical components: the source (where the data comes from), the target (the claim name in the JWT), and the transformation logic (how the data is converted).
Consider a scenario where a client application needs to display a user's internal employee ID, stored in the Keycloak user attribute employee_id. The administrator creates a "User Attribute" protocol mapper.
- Source: The mapper points to the user attribute
employee_id. - Target: The mapper sets the claim name to
employee_id. - Configuration: The mapper is enabled for the "ID Token" and "Access Token" or "UserInfo" endpoint, depending on where the client needs the data.
If the administrator configures a "Script Mapper" instead, the mechanism becomes more complex but powerful. The script receives the user object and the request context. It can perform conditional logic. For example, a script might check if the user's role is "admin". If true, it adds a custom claim is_admin: true to the payload; otherwise, it omits the claim entirely. This mechanism ensures that the JWT payload is never a direct mirror of the user model but a curated view tailored to the specific client's needs.
// Example of a Keycloak Protocol Mapper Configuration (JSON representation)
{
  "name": "Employee ID Mapper",
  "protocol": "openid-connect",
  "protocolMapper": "oidc-usermodel-attribute-mapper",
  "config": {
    "user.attribute": "employee_id",
    "claim.name": "employee_id",
    "id.token.claim": "true",
    "access.token.claim": "false",
    "userinfo.token.claim": "true"
  }
}
Common Pitfalls
Implementing custom claims introduces several risks if not configured with precision. Administrators should be aware of the following common pitfalls:
- Consent Misconfigurations: Assuming that custom claims automatically trigger a consent prompt. In Keycloak, the "Consent Screen" feature must be explicitly enabled in the Client settings to display prompts for custom claims. Without this, custom claims may be transmitted silently if the mapper is active, leading to privacy violations.
- Token Size Bloat: Adding excessive custom claims can significantly increase the size of the JWT. Since the token is passed in the
Authorizationheader of every subsequent request, large tokens can impact network performance and exceed header size limits imposed by proxies or load balancers. - Scope Leakage Risks: Failing to map custom claims to specific, granular scopes can result in over-privileging. If a mapper is attached to a broad scope like
read:profile, a client requesting that scope will receive all associated custom claims, potentially exposing sensitive data to applications that do not strictly need it.
Managing Consent and Claim Visibility
Customizing claims introduces a security consideration: consent. The OIDC specification mandates that clients must request specific scopes, and users must consent to the transmission of data associated with those scopes. When a protocol mapper is configured, it often links to a specific scope.
It is a common misconception that custom claims automatically trigger a user prompt. In reality, Keycloak does NOT automatically prompt for all custom claims. Standard claims (associated with openid, profile, and email) are exempt from custom consent prompts because they are part of the core protocol. For custom claims to trigger a user prompt, the 'Consent Screen' feature must be explicitly enabled in the Client settings.
If a mapper is set to include a claim in the "ID Token", it is generally considered less sensitive than a claim sent to the "Access Token" or "UserInfo" endpoint, but best practice dictates explicit consent for non-standard claims. In Keycloak, the "Consent Screen" configuration determines which claims trigger a user prompt.
When a user logs in, the AS checks the requested scopes. If a scope corresponds to a custom claim (e.g., read:profile), and the consent screen is enabled, the AS renders a consent screen listing the specific claims that will be transmitted. The user sees "Your email address" and "Your employee ID". If the user denies consent, the protocol mapper logic is suppressed for that session. The claim is not included in the final JWT. This mechanism prevents silent data leakage where a client inadvertently receives more identity information than the user authorized.
Operationalizing Custom Claims: A Worked Scenario
To see this in action, imagine a healthcare application where the provider needs the user's insurance_provider attribute. This attribute is stored in Keycloak as a user attribute.
Step 1: Attribute Creation
The administrator ensures the insurance_provider attribute exists in the user model. This is a raw data point, invisible to the OIDC client at this stage.
Step 2: Mapper Configuration A new "User Attribute" protocol mapper is added to the client "HealthApp".
- Name: Insurance Provider Mapper
- Source Attribute:
insurance_provider - Claim Name:
insurance_provider - Token Types: ID Token, Access Token, UserInfo
- Consent: Enabled (Scope:
read:insurance)
Step 3: Client Request
The HealthApp initiates an authentication request with the scope openid profile read:insurance.
Step 4: Token Issuance
The Keycloak server processes the request. It finds the insurance_provider attribute in the user model. It executes the mapper logic, injecting the value into the insurance_provider claim. The resulting ID token looks like this:
{
  "iss": "https://keycloak.example.com/realms/healthcare",
  "sub": "a1b2c3d4-e5f6-7890-abcd-ef1234567890",
  "name": "Jane Doe",
  "email": "jane.doe@example.com",
  "insurance_provider": "BlueCross",
  "iat": 1678886400,
  "exp": 1678890000
}
Notice that insurance_provider is now part of the signed token. The client can verify the signature and trust the value. If the mapper had not been configured, this key would be absent, and the client would have to query a separate backend API to retrieve it, increasing latency and coupling.
Step 5: The UserInfo Endpoint
If the client requests the userinfo endpoint with the access token, Keycloak runs the same mapper logic again. The response is a plain JSON object, distinct from the signed JWT format (JWS). While the structure of the data (the keys and values) remains identical to the token payload, the delivery mechanism differs: the UserInfo response is an HTTP response body, not a cryptographically signed token string.
{
  "sub": "a1b2c3d4-e5f6-7890-abcd-ef1234567890",
  "name": "Jane Doe",
  "email": "jane.doe@example.com",
  "insurance_provider": "BlueCross"
}
Practical Takeaways
Before finalizing your OIDC configuration, consider these best practices derived from the mechanics discussed:
- Explicit Scope Mapping: Always map custom claims to specific, granular scopes (e.g.,
read:insurance) rather than relying on broad scopes likeprofile. This ensures that consent prompts are accurate and users retain control over specific data points. - Enable Consent Screens: Do not assume default behavior. Explicitly enable the "Consent Screen" in your Keycloak client settings if you require user approval for any custom claims beyond the standard
openid,profile, andemailscopes. - Monitor Token Size: Periodically audit your ID tokens to ensure the inclusion of custom claims does not bloat the payload size, which can lead to performance degradation or header limit errors in production environments.
FAQ
Q: Do custom claims always trigger a consent prompt? A: No. Standard claims are exempt. Custom claims only trigger a prompt if the "Consent Screen" feature is explicitly enabled in the client settings within Keycloak.
Q: Can I use a script mapper to exclude claims based on user roles?
A: Yes. Script mappers allow for dynamic logic. You can write JavaScript to inspect user attributes (like role) and conditionally include or exclude specific claims from the JWT payload.
Q: What happens if a user denies consent for a custom claim? A: If consent is denied, the protocol mapper logic associated with that claim is suppressed for that session. The claim will not appear in the ID token, Access Token, or UserInfo response, even if the mapper is configured.
Conclusion
Customizing OIDC claims is fundamentally about defining the rules of transformation between your identity store and your applications. By using protocol mappers, you avoid hardcoding logic in the application code and keep the identity definition centralized. The mechanism ensures that the JWT payload is a minimal, consented, and verified subset of the user's total identity. Every custom claim you add requires a corresponding mapper configuration and, ideally, a scoped consent interaction. This approach maintains the integrity of the OIDC protocol while providing the flexibility required for modern enterprise applications.
In practice, the distinction between "standard" and "custom" claims is often blurred by implementation, but the mechanism remains the same: a mapper bridges the gap. Whether using the built-in attribute mappers or writing custom JavaScript scripts, the goal is deterministic, auditable claim generation. As you scale, remember that every additional claim increases the token size and the surface area for consent management. Prioritize only the claims strictly necessary for the client's function.
Related posts
Keycloak Client Scopes and Protocol Mappers Explained
A detailed look at Keycloak client scopes and protocol mappers for token customization and claim management.
Implementing WebAuthn in Keycloak: Passkey Authentication Setup
A walkthrough for configuring WebAuthn and passkeys within Keycloak to enable passwordless authentication using FIDO2 standards.
Implementing Just-in-Time Provisioning with SAML and OIDC
A technical guide on configuring just-in-time provisioning using SAML and OIDC with SCIM for automated identity management.